Using Light to Highlight Landscape Features
Landscape lighting isn’t just about visibility — it’s an art form that can elevate your outdoor space after dark. From highlighting trees to enhancing textures, the right use of light creates both beauty and function.
Spotlighting Key Features
Use uplights and spotlights to draw the eye and shape the ambiance. Choose what features deserve attention and place your lighting with intent.
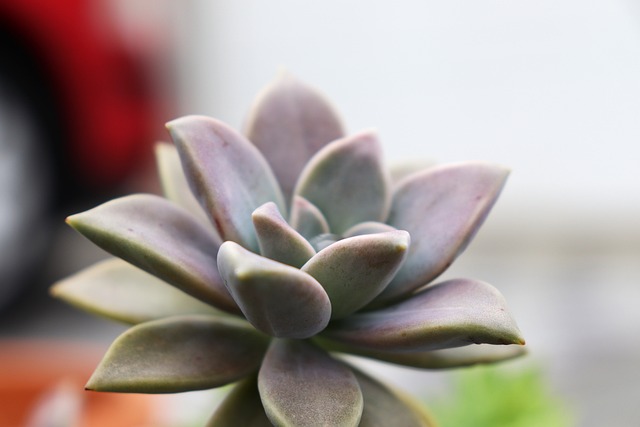
- Trees and shrubs: Uplighting can emphasize structure, texture, and seasonal foliage
- Stonework or sculptures: Spotlights add drama and depth to static features
- Architectural elements: Consider lighting columns, entryways, or retaining walls for added dimension
Creating Depth and Dimension
A well-lit yard should have layers of light. Avoid flat or one-dimensional lighting by mixing different angles, intensities, and distances.
- Combine low, mid, and high lighting for depth
- Use backlighting to create compelling silhouettes
- Place lights at varying distances to add perspective
Avoiding Harsh or Artificial Effects
Over-lighting or poor placement can create glare or unnatural coloring. The goal is to complement what’s already there, not overpower it.
- Use warm white bulbs for a natural look
- Shield fixtures to direct light where it’s needed
- Avoid unnecessary brightness — subtle is better
Strategic lighting should create a scene that feels welcoming, balanced, and true to the landscape’s natural character. Thoughtful placement makes the difference between a yard that simply looks lit and one that looks alive.
Mastering Lighting Tone: Warm vs. Cool Outdoors
Lighting tone can drastically shift the mood and aesthetic of your vlog. When filming outdoors, choosing the right temperature—warm or cool—can mean the difference between a video that feels inviting and one that feels distant or unnatural.
Warm vs. Cool Tones: Choosing the Right Look
Both warm and cool lighting have their place, but it’s important to understand how each affects your visual storytelling.
-
Warm tones (golden, amber, soft white)
Best suited for: Sunsets, lifestyle content, cozy settings
Creates a mood of: Comfort, friendliness, relaxation -
Cool tones (blue, white, neutral daylight)
Best suited for: Morning shoots, tech content, sleek or modern vibes
Creates a mood of: Energy, clarity, crispness
The Emotional Impact of Light Temperature
Light does more than illuminate—it sets the emotional tone.
- Warm lighting can make scenes feel nostalgic or personal
- Cool lighting adds an edge, creating sleek or professional visuals
- Neutral daylight is a versatile default but works best when diffused naturally
Understanding these psychological effects allows you to match lighting tone with your content’s intent.
Bulb Tips for Outdoor Lighting Setups
Even outdoors, artificial lighting plays a key role—especially during early mornings, late evenings, or cloudy days.
- Use adjustable LED panels with color temperature control (2700K to 6500K is ideal)
- Invest in bi-color lights to easily switch between warm and cool settings
- Consider diffusion filters to soften light and avoid harsh, unnatural shadows
- Opt for portable battery-powered lights for maximum flexibility and easy on-location shooting
Matching your lighting tone to the story you want to tell, even in natural environments, will elevate the overall feel of your content.
Lighting does more than just make a room look nice. It sets a mood. It defines how people feel in a space, often without them realizing it. A warm glow makes a room feel calm. Cool, bright light pushes focus and energy. The point is, lighting isn’t decoration. It’s atmosphere. And for vloggers, that’s everything.
The way you light your space determines how long people want to stay there—both online and off. Proper lighting turns a kitchen into an evening hangout, a living room into a shoot-ready studio, or a corner nook into your go-to edit zone. When done right, lighting stretches the function of every area. You don’t need more space. You just need better control over how it feels. And when the vibe is right, content—and life—flows smoother.
Lighting isn’t just about looking good on camera. It’s what makes a space feel natural, focused, and watchable. For vloggers stepping up their production game, understanding the three essential layers of lighting—ambient, task, and accent—is non-negotiable.
Ambient lighting is your base. It lights the whole space evenly and sets the tone. Think ceiling lights, softboxes in the corners, or a big window if you’ve got good daylight. It should be soft, diffused, and out of the way. This layer keeps the frame from feeling flat or overexposed.
Task lighting is more focused. It highlights what you’re doing or where your face is. Ring lights, key lights, desk lamps—they all count, depending on what you’re filming. You want this layer to shape your features without throwing harsh shadows. Especially important if you’re shooting makeup tutorials, desk setups, or talking-head clips.
Accent lighting adds depth and character. This could be an LED strip under a shelf, a colored bulb behind your monitor, or a warm spotlight on a decor piece. Accent lights don’t just look cool. They help guide the viewer’s eye and make your vlogs feel more curated.
Stack all three, and you get visual comfort plus a cinematic touch. Skip one, and you risk looking flat, overlit, or just plain dull. Getting lighting right isn’t just technical—it’s part of the story you’re telling.
Outdoor Lighting That Works (and Wows)
Lighting is one of the most powerful ways to elevate your outdoor space. The right setup not only creates atmosphere but also extends the functionality of your lounge area well into the evening.
Choose the Right Fixtures for Impact
When it comes to visual appeal, certain lighting elements stand out more than others:
- String lights: Ideal for a soft, ambient glow. Hang them above seating areas or weave them through a pergola.
- Lanterns: Great for movable charm. Place them on tables, steps, or corners for gentle accent lighting.
- Sconces: Wall-mounted fixtures that frame your outdoor walls or entry points with polished light.
Each option can be both decorative and functional. The key is choosing styles that complement your design without overcrowding the space.
Balance Aesthetics with Outdoor Durability
Style matters, but your lights also need to withstand the elements over time. Look for:
- Weatherproof materials like powder-coated metals, stainless steel, or treated wood
- Lighting rated for wet or damp locations, depending on your climate
- LED bulbs for longer lifespan and energy efficiency
Don’t sacrifice function for form—or vice versa. Aim for lighting that looks good and lasts through every season.
Coordinate with Your Outdoor Theme
For a cohesive look, your lighting should reflect the design language of your space. Consider:
- Matching warm or cool tones with your existing furniture palette
- Choosing similar finishes or materials (like rattan lanterns to echo wicker seating)
- Using lighting height and placement to mirror your layout’s flow
Smart lighting choices always support the vibe you’ve already created.
Want to take your full layout to the next level?
Get more tips on designing the full space: How to Create a Relaxing Outdoor Lounge Area
Solar lighting isn’t a one-size-fits-all solution. In areas with consistent sun exposure—think Arizona, parts of California, or southern Spain—it performs great. Panels soak up sunlight during the day and feed battery-powered LEDs after dark. But in cloud-heavy or densely shaded zones, solar struggles. Trees, tall buildings, or long winters drastically cut charge time and performance. If you’re in a low-light area, expect dimmer paths and shorter runtimes.
That’s where low-voltage lighting comes in. It uses just a fraction of the electricity of traditional systems while giving you reliable, steady brightness. You don’t get the same off-grid independence as solar, but you don’t sacrifice visibility either. Running costs stay low, and it’s easier to control output.
Maintenance is the trade-off both systems share. Solar lights require you to keep panels clean and batteries fresh. Low-voltage setups need occasional bulb replacements and wire checks. Neither is maintenance-free, but they’re far lighter than old-school lighting rigs. Bottom line: choose based on your climate, usage patterns, and tolerance for upkeep.
Lighting your space isn’t just about visibility. It’s also safety, flow, and making things feel intentional. Start with the basics: steps, walkways, and transitions between zones like patios or garden paths should always be lit. Soft under-step lights, low-profile bollards, or recessed path lights work well. Avoid anything that casts harsh shadows or blinds the eye as you move.
Over-lighting is a common mistake. More bulbs don’t equal better vibes. Flooding every surface with brightness kills the mood and makes your outdoor spot feel sterile. Stick to small pockets of light and let the shadows do some of the work. Contrast is your friend.
Smart placement is what separates amateur setups from effortless ambiances. Think about how your guests will move. Place lights where they guide—not overwhelm. Accent only what matters: the edge of a deck, a change in elevation, or where one zone ends and another begins. When done right, the lighting fades into the background, doing its job while the focus stays on the experience.
Smart outdoor lighting isn’t just about looks anymore — it’s about control. On one end, you have basic timers. They’ll turn lights on and off at set times. Simple, dependable, and affordable. But if you want your space to adapt to mood, timing, or weather, you’ll need to go smart.
Smart systems offer more flexibility. Motion sensors can adjust brightness automatically. Dimmers let you shift the vibe from bold to soft. Scene presets allow you to switch from ‘dinner party’ to ‘movie night’ with a tap. These setups aren’t just flash — they’re utility-driven, saving energy and effort.
Keeping things modular is the key. You want to be able to rework your setup as needs shift. Maybe today it’s a quiet evening alone. Tomorrow it’s a gathering with friends. Your system should keep up, no question.
Less is more when it comes to outdoor lighting. A common mistake is flooding every corner with brightness, but restraint actually creates stronger visual and emotional impact. Shadows can add mood, highlight textures, and bring attention to what matters.
Letting darkness play a role isn’t a flaw—it’s a strength. Contrast between lit and unlit areas creates balance and calm. When the eye has a resting place, the illuminated elements stand out with more purpose.
Outdoor lighting should be a slow build, not a one-time blast. Start with paths, doorways, or a feature tree. Then adjust. See how light interacts with movement, seasons, or new landscaping. Make notes. Tweak. Over time, the system becomes smarter, more tailored—and a lot more beautiful.
 Quenric Drovayne writes the kind of home and garden trends content that people actually send to each other. Not because it's flashy or controversial, but because it's the sort of thing where you read it and immediately think of three people who need to see it. Quenric has a talent for identifying the questions that a lot of people have but haven't quite figured out how to articulate yet — and then answering them properly.
They covers a lot of ground: Home and Garden Trends, DIY Home Projects, Interior Design Ideas, and plenty of adjacent territory that doesn't always get treated with the same seriousness. The consistency across all of it is a certain kind of respect for the reader. Quenric doesn't assume people are stupid, and they doesn't assume they know everything either. They writes for someone who is genuinely trying to figure something out — because that's usually who's actually reading. That assumption shapes everything from how they structures an explanation to how much background they includes before getting to the point.
Beyond the practical stuff, there's something in Quenric's writing that reflects a real investment in the subject — not performed enthusiasm, but the kind of sustained interest that produces insight over time. They has been paying attention to home and garden trends long enough that they notices things a more casual observer would miss. That depth shows up in the work in ways that are hard to fake.
Quenric Drovayne writes the kind of home and garden trends content that people actually send to each other. Not because it's flashy or controversial, but because it's the sort of thing where you read it and immediately think of three people who need to see it. Quenric has a talent for identifying the questions that a lot of people have but haven't quite figured out how to articulate yet — and then answering them properly.
They covers a lot of ground: Home and Garden Trends, DIY Home Projects, Interior Design Ideas, and plenty of adjacent territory that doesn't always get treated with the same seriousness. The consistency across all of it is a certain kind of respect for the reader. Quenric doesn't assume people are stupid, and they doesn't assume they know everything either. They writes for someone who is genuinely trying to figure something out — because that's usually who's actually reading. That assumption shapes everything from how they structures an explanation to how much background they includes before getting to the point.
Beyond the practical stuff, there's something in Quenric's writing that reflects a real investment in the subject — not performed enthusiasm, but the kind of sustained interest that produces insight over time. They has been paying attention to home and garden trends long enough that they notices things a more casual observer would miss. That depth shows up in the work in ways that are hard to fake.