Choosing the Right Wallpaper
Picking peel and stick wallpaper isn’t just about what catches your eye it’s about what actually works in your space. Start with finish: matte finishes give a soft, subtle vibe while gloss can look punchy but risk glare in bright rooms. If you’ve got textured walls, know this smooth wallpaper won’t always stick cleanly, and even if it does, every bump will show. Either aim for a heavily patterned design that distracts, or prep that surface hard.
Color and pattern are where function meets mood. Light colors can expand small rooms, dark shades bring drama but make a space feel tighter. Patterns? Go big in spacious rooms, small repeats in tight quarters. If you’re working in a bathroom or kitchen, where humidity’s a constant, durability matters. Go vinyl based a solid choice for moisture resistance and always check if the product’s repositionable. That small feature can save huge headaches during install.
Need more nitty gritty on what to look for and why it matters? Hit our full peel and stick guide for deeper details.
Creating a Game Plan
Getting your wall prepped starts with a calculator, not a smoothing tool. First, measure the height and width of each wall you want to cover don’t forget to subtract large windows or doors if they won’t be wallpapered. Then add 15 20% extra for trimming, error, and pattern alignment. It’s better to have leftovers than to run short mid install.
Next, choose your starting point. A lot of people want to begin in a corner and that’s fine but keep in mind that walls, especially in older homes, are rarely square. If your paper has a bold vertical element or repeating pattern, consider starting in a more central spot, or where it’s least noticeable if misalignment happens. Use a level or laser line to keep that first strip dead straight. Everything else depends on it.
Speaking of patterns: double check the repeat before you buy. If the repeat is 24 inches, for example, each strip might need to shift down to match up, wasting more material. That’s something to factor into your coverage calculation.
Here’s a basic supply checklist before you start:
Peel and stick wallpaper (with extra for pattern matching)
Measuring tape and level or laser line
Pencil or chalk for light wall marking
Smoothing tool or plastic scraper
Utility knife with sharp blades
Step stool or ladder
Clean cloth or sponge (for surface dust off)
Don’t overcomplicate it, but don’t wing it either. A good plan makes the next steps smoother.
Prep: The Step Everyone Rushes (But Shouldn’t)
If your surface isn’t clean, your wallpaper won’t stick right. It’s that simple. Start by removing dust with a dry microfiber cloth. Then tackle grease or residue using a mild detergent or a vinegar solution. Pay extra attention in kitchens and bathrooms humidity loves to linger, and it sabotages adhesion fast.
Once clean, the wall has to be completely dry. Not just dry to the touch completely dry. Leave at least 24 hours after washing. And pick a day that’s not overly humid. Room temperature should sit around 65°F to 80°F for best results.
Now, to the part most people skip: priming or sanding. If your wall is porous or slightly textured, primer levels the surface and gives the adhesive something to grip. Light sanding smooths bumps, especially around patched or rough areas. It’s extra effort that’ll save you from peeling edges or bubbling later.
Still unsure what your wall needs? Go back to our peel and stick guide for a full checklist and product tips. Trust us getting this part right is half the battle.
Smart Installation Tactics
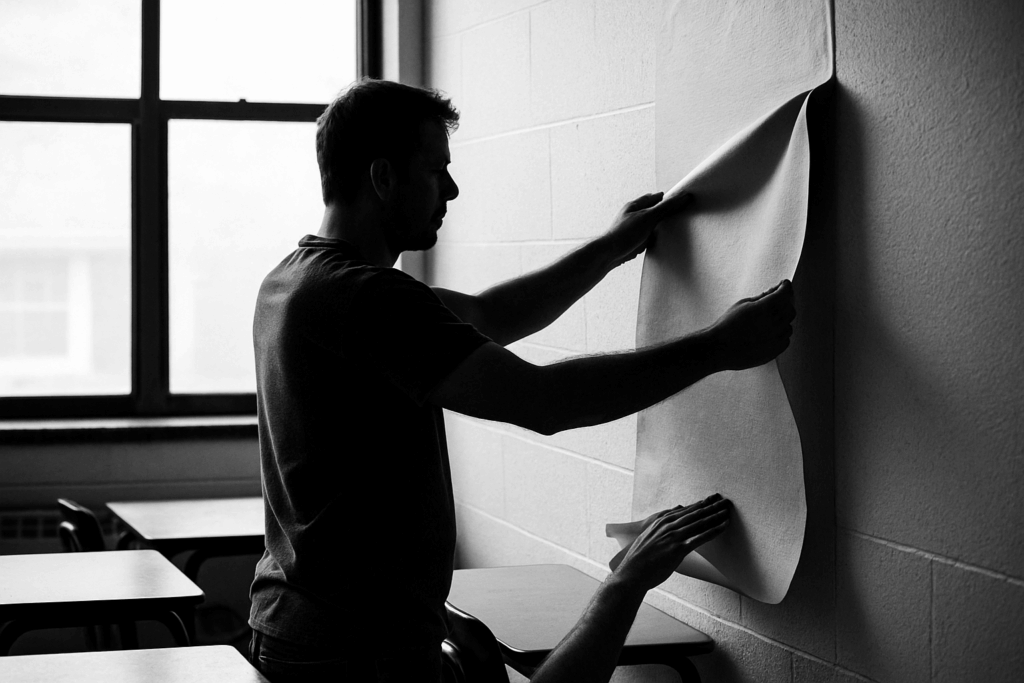
Let’s get one thing clear: peel and stick wallpaper is only hassle free if you don’t rush it. That starts with peeling in small sections no hero moves peeling full sheets. Pull back maybe 6 to 12 inches of backing at a time. It helps you stay in control and makes fixing alignment easier.
Next up: smoothing. You need a tool for this don’t trust your hands. A plastic smoothing tool or even a credit card works if you’re careful. Start from the center and press outwards as you go. This pushes out air pockets and keeps wrinkles in check.
When it comes to seams, you’ve got two options: overlap or butt. If your wallpaper has a busy pattern, slight overlaps usually hide well and reduce visible gaps over time. But for cleaner, modern designs, butt seams where edges meet perfectly without overlapping look sharper. Just be precise.
Corners, outlets, windows these are the slow down zones. Don’t fight the wallpaper. At outlets, remove the cover plates and trim around the opening. For windows and corners, use a utility knife to lightly score the material after smoothing, then tuck and trim carefully. It doesn’t need to be perfect on the first try, but it does need to be steady.
Use patience like a tool. It pays off in the finish.
Handling Mistakes (And Avoiding Panic)
Even the steadiest hands mess up a panel now and then. The trick is knowing how to fix it without wrecking the wallpaper or your patience.
First, if you need to reposition a strip, don’t yank. Peel slowly from the top corner, pulling back at a shallow angle. Most peel and stick wallpapers are engineered to tolerate a few retries, but they’re not superhero capes stretch them too much and they lose shape or grip.
For trapped air bubbles, forget fingernails or safety pins. Use a smoothing tool, credit card, or even a clean kitchen scraper. Work from the center out, easing bubbles toward the edge. If they’re stubborn and small, a pinprick and gentle press can release the air without damaging the adhesive.
Misalignment in the middle of a wall happens. If the panel’s just a few millimeters off but everything else is lining up, keep going and camouflage it with decor. If it’s noticeably crooked or impacting your pattern match, it’s worth the pain to lift, realign, and reset. Better to fix now than regret it every time you walk by.
Bottom line don’t panic. Wallpaper’s forgiving, if you respect the material and act with purpose.
Wrapping Up: Edges, Trims, and Long Term Tips
A clean finish makes all the difference. When trimming around baseboards and ceilings, use a sharp utility knife and a straight edge no guesswork. Work slowly and press firmly. Rushed cuts lead to jagged edges and peeling sections down the line.
Once your wallpaper’s up and trimmed, it’s worth sealing the edges especially in high traffic or high humidity areas. A thin bead of clear, paintable sealant around the perimeter helps keep corners from curling without drawing attention to itself. Think utility, not overkill.
For cleaning, stick to the basics. Mild soap and water on a damp cloth usually do the trick. Avoid anything abrasive or alcohol based those will eat away at the adhesive or damage the print. Spot test if you’re not sure. If it’s vinyl based wallpaper, you’ve got more durability, but still: gentle wins.
Eventually, you might want a change. When it’s time to remove, heat is your ally. A hairdryer on low helps soften the adhesive. Work from a top corner, pulling at a low angle and staying slow and steady. The goal here is zero wall damage and zero regrets.
Simple tools, solid prep, and patience that’s the difference between a peel and stick disaster and a setup that actually lasts.
 Quenric Drovayne writes the kind of home and garden trends content that people actually send to each other. Not because it's flashy or controversial, but because it's the sort of thing where you read it and immediately think of three people who need to see it. Quenric has a talent for identifying the questions that a lot of people have but haven't quite figured out how to articulate yet — and then answering them properly.
They covers a lot of ground: Home and Garden Trends, DIY Home Projects, Interior Design Ideas, and plenty of adjacent territory that doesn't always get treated with the same seriousness. The consistency across all of it is a certain kind of respect for the reader. Quenric doesn't assume people are stupid, and they doesn't assume they know everything either. They writes for someone who is genuinely trying to figure something out — because that's usually who's actually reading. That assumption shapes everything from how they structures an explanation to how much background they includes before getting to the point.
Beyond the practical stuff, there's something in Quenric's writing that reflects a real investment in the subject — not performed enthusiasm, but the kind of sustained interest that produces insight over time. They has been paying attention to home and garden trends long enough that they notices things a more casual observer would miss. That depth shows up in the work in ways that are hard to fake.
Quenric Drovayne writes the kind of home and garden trends content that people actually send to each other. Not because it's flashy or controversial, but because it's the sort of thing where you read it and immediately think of three people who need to see it. Quenric has a talent for identifying the questions that a lot of people have but haven't quite figured out how to articulate yet — and then answering them properly.
They covers a lot of ground: Home and Garden Trends, DIY Home Projects, Interior Design Ideas, and plenty of adjacent territory that doesn't always get treated with the same seriousness. The consistency across all of it is a certain kind of respect for the reader. Quenric doesn't assume people are stupid, and they doesn't assume they know everything either. They writes for someone who is genuinely trying to figure something out — because that's usually who's actually reading. That assumption shapes everything from how they structures an explanation to how much background they includes before getting to the point.
Beyond the practical stuff, there's something in Quenric's writing that reflects a real investment in the subject — not performed enthusiasm, but the kind of sustained interest that produces insight over time. They has been paying attention to home and garden trends long enough that they notices things a more casual observer would miss. That depth shows up in the work in ways that are hard to fake.